The ¥30,000 (~$200) Desk Upgrade: How to Prioritize Across 3 Plans
The ¥30,000 (~$200) Desk Upgrade: How to Prioritize Across 3 Plans
How much your desk can change on a ¥30,000 (~$200) budget depends heavily on the order in which you buy things. Whether you want to ease shoulder and back pain, clear up desk clutter, or make a small room more workable, the right investment changes accordingly.
How far a ¥30,000 (~$200 USD) budget can take your desk comes down, honestly, to buying order. The right priority depends on whether you want to reduce shoulder and back strain, clean up desk clutter, or squeeze more productivity out of a small space.
This article draws a realistic line around what a ¥30,000 budget can actually accomplish, then compares three plans: standing desk–focused, balanced peripherals, and compact space optimization. By the end, you should have a clear picture of the "first three items worth buying" for your situation — along with a concrete shopping list with reference prices.
What Can ¥30,000 (~$200) Actually Do for Your Desk?
The Realistic Scope and Outcomes at This Budget
A vague "it'll feel better" outcome isn't good enough. At the ¥30,000 range, realistic improvements include: boosting desk illuminance from the bare minimum of around 300 lx toward something genuinely comfortable, reducing exposed cables so only the wires you actually need remain visible, and reclaiming usable desk surface through a monitor riser or laptop stand. These figures shift by product and setup, so what follows treats them as "rough guides" and "personal impressions."
One approach is to go all-in on posture. Sit-stand desks have come down considerably in price — manual models now appear in the roughly ¥15,000–40,000 (~$100–270 USD) range per comparisons on sites like mybest, and PC Watch has covered a motorized desk from Nitori priced at ¥19,990 (~$133 USD) on the official site. That said, centering your ¥30,000 around a sit-stand desk leaves little breathing room for lighting and cable management. Conversely, keeping your current fixed desk and directing funds toward a monitor light, cable tray, and monitor riser won't turn heads, but it reliably improves your overall score.
Prices here are reference prices as of March 2026. Desk peripherals fluctuate by timing and retailer — always verify current pricing before buying.
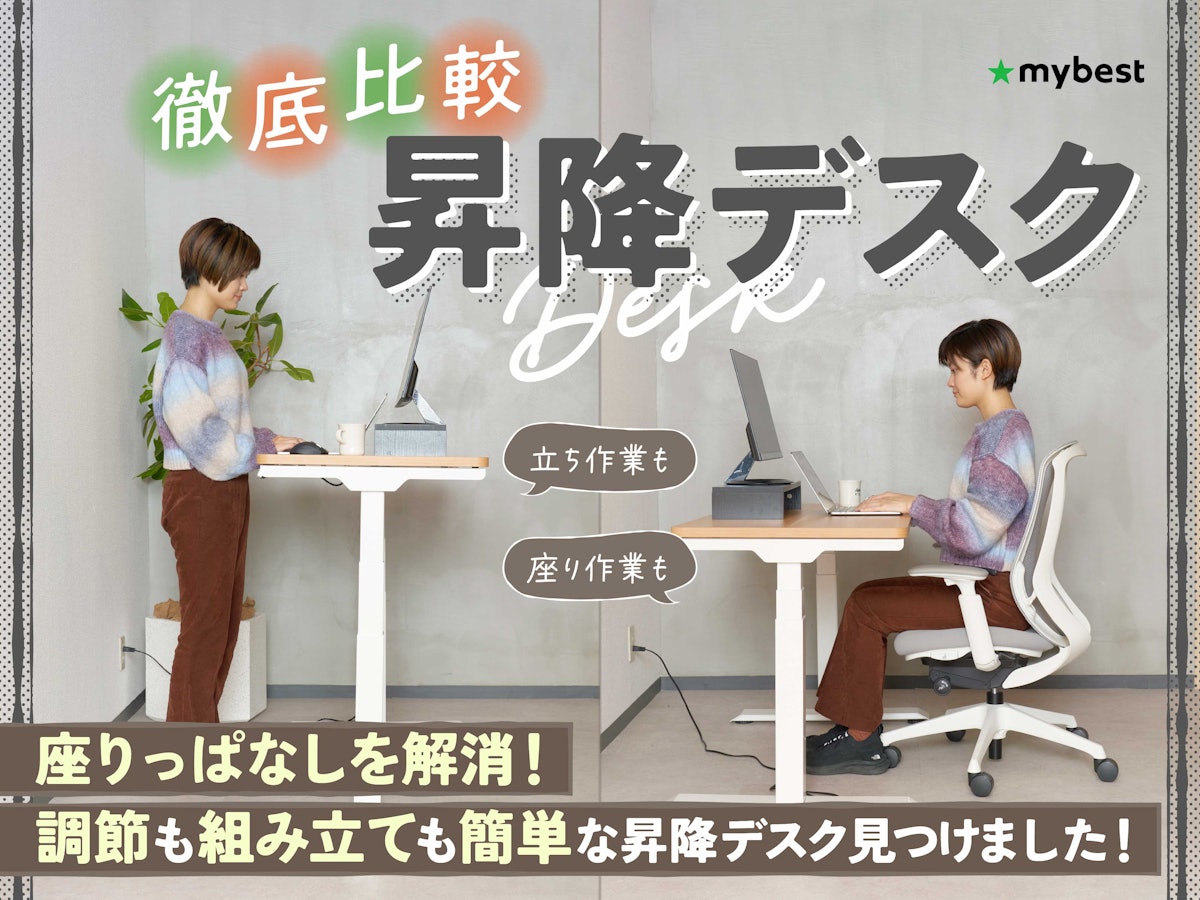
【25種徹底検証】昇降デスクのおすすめ人気ランキング【テレワークの方必見!】
高さを調節でき、1台で立ち作業・座り作業に対応できる昇降デスク。立って作業することで、適度な運動の促進や集中力向上の効果が期待できます。FlexiSpot・コクヨ・ニトリ・IKEAなど多くのメーカーが販売しているほか、電動式・ハンドル式・ガ
my-best.comWhy This Isn't a High-End Desk Tour
The setups you see in social media desk tours operate by different rules than a ¥30,000 improvement plan. The goal here is to build on your existing environment and raise both efficiency and comfort. Custom oversized desktops, premium chairs, multi-monitor rigs, and high-end monitor arms with heavy steel construction are not part of this budget bracket.
Even looking at just sit-stand desks, the difference is obvious. The IKEA SKARSTA, a manual crank model capable of adjusting from 70–120 cm in height, was a well-known benchmark — historical pricing from 2016 shows the 120×70 cm configuration at ¥19,990 (~$133 USD) and the 160×80 cm at ¥26,990 (~$180 USD). These are past figures; always check the IKEA website for current availability and pricing.
High-end setups can afford visual coherence and the satisfaction of ownership. A ¥30,000 build targets the step before that: "shoulders don't creep up," "no visual clutter," "hands aren't working in the dark," "easy to clean." What does the work here is the supporting cast — monitor lights, clamp-mount cable trays, monitor risers, laptop stands, slim drawer units. Each is unremarkable alone, but together they cut visual noise and reduce physical strain.
Comparing a desk setup worth hundreds of thousands of yen to a ¥30,000 improvement is apples to oranges. But as a work tool, just keeping cables off the floor, lighting your hands properly, and stabilizing your keyboard position changes how easily you can settle into work. It won't win on looks, but it's more than capable of removing daily friction.
The Core Principle: When in Doubt, Start With Lighting and Cables
When you're not sure how to allocate ¥30,000, put lighting and cable management first. The reason is straightforward: both work with your existing desk, the failure cost is relatively low, and the impact is immediate. Swapping out the desk itself involves sizing, delivery, stability, and assembly — a lot to juggle. A monitor light or cable tray just adds to what's already there.
Lighting comes first because visibility directly determines fatigue. In office contexts, 300 lx at the work surface is often cited as a minimum — but barely meeting that threshold isn't the same as working comfortably. Monitor lights don't eat up desk space and can be aimed precisely at your hands. BenQ recommends around 5000K–6500K for daytime work, and the idea of adjusting brightness and color temperature by task has become mainstream. A study published on J-STAGE found that under a fixed desk illuminance of 900 lx, a lighting system with natural color temperature variation reduced fatigue and drowsiness better than a fixed 5000K light. Replicating that level of precision at home isn't necessary — but moving from relying on a dim overhead light to properly illuminating your hands makes a real difference.
Cable management belongs right alongside lighting — and not just for aesthetics. Routing a power strip and AC adapters into a clamp-mount cable tray cuts down on floor-cleaning hassle and makes tracking what's plugged in where much easier. A typical 5 kg–rated tray handles a power strip plus a handful of adapters without issue, breaking the habit of "let it fall to the floor." Many products support table tops from 10–40 mm thick, and sturdier models go up to 20 kg. Moving the weight behind the desk, out of your sightline, noticeably clears the room.
💡 Tip
When you're unsure how to split ¥30,000, get the foundation right with lighting and cables first, then put the rest toward ergonomics or space optimization. The visual change is subtle, but in daily use this ordering prevents the most regret.
After that foundation, how you distribute the remainder determines your plan. If long hours in an ill-fitting chair are your primary complaint, tilting toward a sit-stand desk makes sense. If you want to maximize your current setup, a monitor riser or laptop stand for space optimization pairs better with this budget. Adjustable risers like those in Amazon Basics' lineup — with height range around 7.3–12.3 cm — let you slide a slim keyboard underneath, effectively expanding your usable work surface. Aluminum laptop stands are a bit heavier, which actually helps: they don't shift during typing, and raising your eye level on a fixed desk is immediately noticeable.
The core principle: allocate spending toward root causes first. Poor visibility, cable sprawl, cramped working space — these are all fixable for relatively little. Large-ticket items like a new desk or chair have big payoff potential, but at ¥30,000 they crowd out everything else. That's why lighting and cables, in that order, are the most reliably effective starting point.
Four High-Impact Improvements to Address First
Ergonomics and Height Adjustment
If you want results from ¥30,000, the first priority is reducing mismatches between your body and your setup's height. Desk discomfort far more often comes from elbow and eye-level misalignment than from a lack of flashy gear. A desk that's too high causes your shoulders to ride up; too low and your back rounds. That misalignment is what leads to shoulder and lower back strain — a well-established pattern in ergonomics literature.
The easy anchors: elbows at roughly 90–100°, and eyes level with or slightly below the top edge of your monitor. With both dialed in, your shoulders stay relaxed during typing and your neck stops pushing forward. Even on a fixed desk, you don't need to replace everything. Raising your screen with a monitor riser, pairing a laptop stand with an external keyboard, or raising your chair and adding a footrest can each produce a noticeable improvement.
A sit-stand desk is the cleanest solution if posture is your chief complaint. Manual models are visible in the ¥15,000–40,000 (~$100–270 USD) range, and motorized versions have appeared under ¥20,000 (~$133 USD). But the more budget you devote to the desk, the less room remains for the rest. If posture is clearly the problem, prioritizing a sit-stand desk is logical — but if you're also dealing with poor lighting or messy cables, adding height-adjusting accessories to your existing desk often delivers more total satisfaction.
Ergonomics, broadly: designing tools and work posture to fit the human body, reducing strain in the process.
Lighting: Both Quantity (Lux) and Quality
Lighting isn't just about brightness — both quantity and quality need to be right to avoid eye fatigue during long sessions. The practical quantity benchmark is 300 lx or more at the work surface. Overhead lighting alone can leave your keyboard and handwritten notes in shadow, and the contrast with a bright screen strains your eyes. That's why lighting often gets top billing in desk improvement guides — that "hard-to-see" feeling directly undermines focus.
For quality, daytime work benefits from 5000K–6500K color temperature. This cooler, crisper band suits text editing, spreadsheets, and other focused daytime tasks. Warmer tones are fine for unwinding, but during the workday they can quietly invite drowsiness. Adjustable-temperature lights are useful precisely here — you can shift between "sharp thinking" and "winding down" light as the day or task changes.
Research backs this up: a J-STAGE study found that under a fixed 900 lx desk illuminance, lighting with naturally shifting color temperature outperformed a fixed 5000K light in reducing fatigue and mental tension. You don't need to replicate this at home with precision, but the takeaway — adjustable color temperature outperforms a single fixed setting — is worth keeping in mind.
From a space perspective, monitor lights are particularly well-suited. Unlike stand-style desk lamps, they don't consume table space and focus light naturally onto your hands without adding a large support column to your visual field. High color rendering index (Ra) models keep the colors of paper and nearby gear from looking off.
Illuminance (lx): how brightly a surface is lit. Color temperature (K): the tone of light — higher values appear cooler and whiter, lower values warmer. Color rendering index (Ra): how accurately a light source renders colors — higher values mean colors look more natural.
オフィス作業効率向上のための色温度変動照明の研究
前回の実験により, 被験者の主観的選択から求められたオフィス照明の最適な色温度は自然光に近似した変化を示すことが分かった. 今回は, 求められた色温度変動カーブによるアンビエント照明の制御と一般的な5000K一定の照明要件とを比較して心理&
www.jstage.jst.go.jpCable Management: The Method for Reducing Visible Clutter
The goal of cable management isn't arranging each wire neatly — it's reducing how many cables are visible. Most of the "cluttered desk" feeling comes not from the sheer number of cables, but from how many are exposed within your sightline and on the floor. Tackling that alone improves appearance, cleaning ease, and plug-tracking in one move.
The baseline: get your power strip and AC adapters into a clamp-mount cable tray and shift that weight under the desk. Typical clamp-mount trays attach to the desk edge and accommodate table tops roughly 10–40 mm thick. A 5 kg–rated tray easily holds a strip plus several adapters — and the perceptual effect of all those black cords disappearing from the floor is substantial.
Add a cable holder from there, and you can limit what's on the desk surface to only what you're actively using. The only cables that need to stay visible are your keyboard, mouse, and a USB-C charging cable. Cords for your monitor, PC, power strip, and chargers belong behind the desk. That alone keeps vacuum cleaners and floor wipes from snagging cables, and you can trace each wire at a glance.
Cable management works more on speed of re-entry into work than on looks. Adapters tangled on the floor drain your motivation before you've even started. Tuck them all behind the desk, and every plug and re-route becomes less of a chore. Mesh trays from manufacturers like Sanwa Supply excel at this "hide everything behind the desk" approach.
⚠️ Warning
Think of cable management as "eliminating exposure" rather than "bundling neatly." Three cables to address first: the one falling to the floor, the one crossing the desktop, and the charging cable you're not currently using. Removing just those three meaningfully reduces the clutter you feel.
Reducing Visual Noise: Limit Permanent Desk Items to 3 Categories
A desk that supports focus isn't necessarily sparse — it's one where the variety of always-visible things is small. Visual noise reduction is easy to overlook in desk improvement, but it works. Too many permanent fixtures on the desktop create cognitive load before you've even started a task. A useful framework: limit what stays on the surface permanently to three categories.
The recommended three are input devices, display devices, and tier-one essentials you use every single session. Input: keyboard and mouse. Display: monitor or laptop. Essentials: one pen, earphones, a drink. Everything outside this set — charger boxes, unread documents, spare cables, a headphone stand you haven't touched in weeks — belongs in a drawer, wagon, or wall-mounted storage.
This pairs naturally with a monitor light to eliminate the stand. A regular desk lamp is useful, but on a small desk the arm and base become part of your visual clutter. A light that sits atop the monitor adds illumination without adding another object to track. Combined with a wall-facing layout, this creates a "only the work surface is in view" effect that's particularly effective in studio apartments or at shallow desks.
Wall space is also a lever in compact setups. Moving notes, charging spots, and small items to the wall clears the desk's visual corridor. Spreading items horizontally on the desk competes with your active workspace; sending them upward or backward preserves more of your hand's range of motion. Frame this as reducing the amount of information reaching your brain, and the logic of the arrangement becomes intuitive.
Three Realistic Plans for Your ¥30,000 (~$200)
Comparison Table: The 3 Plans at a Glance
The fastest way to decide how to spend ¥30,000 is to ask: "What do I most want to stop struggling with?" Whether it's incorporating stand-up time, maximizing a fixed desk, or reducing the overwhelming feeling of a small room, the configuration changes significantly. Here's a side-by-side comparison of three practical approaches.
| Plan | Estimated Total | Main Purchases | Best For | Trade-off |
|---|---|---|---|---|
| ① Sit-stand desk–focused | ~¥20,000–30,000 (~$133–200 USD) | Sit-stand desk as centerpiece, minimal cable management | People who sit for long stretches and want to add movement first | Less room for lighting and storage upgrades |
| ② Balanced peripherals | ~¥15,000–30,000 (~$100–200 USD) | Monitor light, cable tray, monitor riser or storage | People happy with their fixed desk who want better visibility and usability | Desk height itself doesn't change |
| ③ Compact space optimization | ~¥20,000–30,000 (~$133–200 USD) | Slim desk with shelf, monitor riser, cable management | People in small or wall-facing spaces who want vertical, not horizontal, expansion | Ergonomic gains depend on layout; less direct than a sit-stand approach |
Prices move by retailer and timing, but within the ¥30,000 envelope the safest strategy is locking in your top three priorities first. Trying to achieve a high-end sit-stand desk, great lighting, and complete cable management simultaneously tends to produce mediocrity in all three. Lean toward the three items that directly address your biggest frustration, and the impact will be clearer.
① Sit-Stand Desk Plan: What's Inside and What to Watch
This plan puts the majority of the budget into the desk itself. For anyone who wants to break up long sitting sessions, it's the most intuitively effective approach. Even occasional standing resets create natural task breaks and reduce the feeling of being glued to the chair.
Manual sit-stand desks are generally available in the ¥15,000–40,000 (~$100–270 USD) range. The IKEA SKARSTA was a well-known manual crank model with 70–120 cm height range (historical pricing notes exist). Prices vary by timing and retailer — check current pricing before purchasing.
Electric is possible too. PC Watch has covered a Nitori motorized desk priced at ¥19,990 (~$133 USD), and gooda has referenced a ¥26,380 (~$176 USD) motorized example. At those prices the ease of use is attractive, but expecting a motor, a generously sized top, solid leg rigidity, a feature-rich control panel, and minimal wobble all from a budget electric model is unrealistic. Brands like FlexiSpot have strong appeal, but if your total budget is ¥30,000 including lighting and cables, their higher-tier models won't fit the math.
The manual-vs-electric difference is simply convenience. A manual crank works fine for switching to standing in the morning and settling back in the afternoon. If you want to flip positions multiple times an hour, electric wins — a crank you stop using because it's annoying defeats the purpose.
The trade-off is clear: within ¥30,000, you can't also go deep on monitor lighting, a riser, and storage. This plan is for people who put posture change first and accept a rougher overall look for now. Think of it as changing the foundation, not finishing the room.
② Balanced Peripherals Plan: What's Inside and How Far It Goes
This is the lowest-risk plan: improve on top of your existing fixed desk, using peripherals. It isn't dramatic, but daily work feel changes significantly. Particularly if dim hands, cable sprawl, and cramped desktop space are all bothering you at once, this is a strong match.
The three anchors: monitor light + clamp cable tray + monitor riser or storage. A monitor light adds hand illumination without touching desk footprint — the roughly 5000K–6500K color temperature BenQ recommends for daytime work suits a wide range of tasks. It breaks the pattern of "bright screen, dark hands," making notes and your keyboard much easier to read.
Cable management punches above its weight. Clamp trays typically support 10–40 mm table tops, with sturdier models rated to 20 kg. A common 5 kg–rated tray easily handles a power strip and a few adapters. In practice, routing all that off the floor feels like a proportionally large improvement for the cost.
A monitor riser is efficient spending. Adjustable stands with a height range of about 7.3–12.3 cm — like those in the Amazon Basics lineup — lift your screen while clearing space underneath for a slim keyboard or small items. A slim keyboard disappears beneath it; your full hand area opens up in front. For laptop setups, a fixed aluminum stand like Rain Design's mStand paired with an external keyboard and mouse creates a natural "screen up, hands down" position. The weight of metal stands is a feature, not a drawback — they don't skid during typing, which quietly matters.
This plan suits people for whom desk height isn't the critical failure, but comfort is lacking. The trade-off is clear: you can't change the height of the desk itself. Adjusting chair height and armrests can compensate somewhat, but there's a ceiling if the desk is fundamentally the wrong size. Even so, the balance of budget efficiency and satisfaction is unmatched among the three plans. Better visibility, tidier cables, and more usable surface area together add up to a meaningfully more capable workstation.
💡 Tip
This plan is most stable when you fix lighting, cables, and desktop storage in that order. None of it requires abandoning your current desk, so every addition directly translates to improved daily use.
③ Compact Space Plan: What's Inside and Layout Tips
In a studio apartment or a shallow-footprint space, improvement strategies designed for large desks simply don't apply. Rather than expanding sideways, think vertically. This plan combines a slim desk with a shelf and uses a monitor riser to build usable workspace while consolidating storage.
A representative slim desk with a shelf — such as the PD desk series from Officecom — measures something like 995 mm wide × 290 mm deep × 720 mm tall. The shallow depth fills up quickly if you put everything on the surface, but a side shelf creates dedicated spots for stationery, power hardware, a router, or a small speaker. Nitori has offered a slim desk (Arunas) around ¥29,990 (~$200 USD), which puts the total desk replacement within reach for this budget.
The slim desk alone doesn't finish the setup. The shallower the desk, the more important it becomes to use a monitor riser or laptop stand to lift the screen and carve out input space in front. A riser that lets you slide your keyboard underneath effectively turns a single-layer surface into two. Adding a slim wagon beside the desk works well too — offloading chargers and stationery that would otherwise sit on the surface.
For layout, positioning against the wall alone tightens up your visual field and can visibly extend concentration spans. Facing the wall rather than leaving space behind you narrows the field of view to just the work surface, and routes cables naturally behind the desk. One easily missed point: wall-facing layouts are heavily influenced by where your outlets are. If the wall socket is on the opposite side from where you'd naturally run your cable tray, every cord has to travel farther, adding floor clutter. In a compact room, that difference shows immediately.
This plan is for people who can't fit a large desk but still need real working space. The trade-off is that ergonomic improvement comes from layout and accessories rather than a direct height change — you won't get the standing posture shifts of a sit-stand desk. But eliminating the collision of objects on a cramped desktop makes it dramatically easier to start working. In small spaces, reducing density matters more than gaining raw square footage.
The Best Buys by Category
Sit-Stand Desks (Manual/Electric): The Realistic ¥30,000 Answer
When thinking about a sit-stand desk within ¥30,000, the first decision is how much of the budget to commit to the desk itself. Manual models are broadly available in the ¥15,000–40,000 (~$100–270 USD) range, which fits this budget's logic reasonably well. Electric models have appeared in PC Watch coverage at ¥19,990 (~$133 USD) from Nitori, and gooda listed an example at ¥26,380 (~$176 USD) — numbers that look achievable. But once you go electric, getting excellent desk-top size, leg rigidity, control panel features, and low wobble all at once becomes difficult.
The IKEA SKARSTA serves as a useful manual reference — a hand-crank model with 70–120 cm range. The 2016 IKEA Japan price points (120×70 cm at ¥19,990 (~$133 USD), 160×80 cm at ¥26,990 (~$180 USD)) remain useful ballpark figures for what "getting height adjustability" costs. For people who aren't switching positions constantly throughout the day, manual works fine. For anyone who wants to flip between sitting and standing several times an hour, the crank becomes a deterrent.
FlexiSpot's upper-tier models like the E7 and E8 are rated for 160 kg load capacity in some reviews, with strong rigidity and expandability. Realistically, though, those models don't fit a ¥30,000 budget that also includes lighting and cable management. Going electric means making peace with "prioritize the height-adjustment function; minimize everything else."
What matters beyond price: table top size, weight capacity, and wobble. A 120×70 cm top handles a laptop-centric setup; once you add dual monitors or large speakers, it gets tight. Weight capacity matters not just for "can it hold this" but for whether a heavy monitor and arm wobble during typing. For electric speed, I found no clear published specs in the sources I reviewed — "electric is easier if you switch often" is sufficient for decision-making.
At ¥30,000, the honest position is: manual sit-stand just barely makes sense; budget electric is possible only if you're comfortable with the limitations. It's the right call if posture change is your top priority — but if you also want to fix lighting and cable clutter, a fixed desk plus peripherals gives better overall satisfaction.
Cable Trays and Holders: Thickness Specs, Weight Ratings, and Installation
Cable management is often treated as an afterthought, but its cost-effectiveness stands out. Clamp-mount cable trays typically support table tops from about 18–30 mm, and data sheet listings commonly show 10–40 mm compatibility ranges. That means most existing desks are supported — no replacement required.
Weight ratings vary widely. Sturdier models are rated to 20 kg. More typical wire mesh or grid trays fall in the 3–6 kg range. In practice, that's plenty: a power strip and several AC adapters add up to well under those limits. Think of these trays not as precise weight management tools but as receivers that move the "black mass" of cables off the floor and out of sight.
The installation trap most people miss isn't the tray spec — it's the underside of their desk. Desks with rear panels, thick reinforcement bars, or built-in cable management holes all limit where the clamp can bite. Add monitor arms competing for the same clamping real estate and your ideal layout (arm in the center, trays flanking on both sides) may be physically impossible.
Cable holders serve a different function from trays. If a tray is the bin where your power strip and excess cable length go, a holder is the anchor that keeps the one cable you touch every day from disappearing behind the desk. Brands like Elecom make edge-mounted holders perfect for USB-C charging cables. Without holders, tidying cables into a tray causes your daily-use cord to vanish into the back — you'll pull it out again and again.
ℹ️ Note
A cable tray's usability depends less on its weight rating than on whether the clamp has room to grip. Desks with a reinforcement bar running behind the top edge can block mounting even when the dimensions technically match.
Monitor Light vs. Desk Lamp: Which One First?
If you can only choose one, go with the monitor light for monitor-centric work. It adds almost no desk footprint while solving visibility around the screen and at your hands simultaneously. For anyone using an external monitor or a laptop in a fixed position, it offers more flexible placement than a lamp and doesn't claim the corner of your desk.
Monitor lights also come with glare-reduction optics in better models. BenQ's ScreenBar series, for example, uses asymmetric optics specifically to avoid bouncing light back at the screen — avoiding the "brighter but harder to read" trap. Color accuracy matters too: an Ra95 high-CRI model keeps the color of paper notes and nearby gear from looking washed out. A light with a wide color temperature range — say, 2700K to 6500K — lets you run warmer in the evening and cooler during focused afternoon sessions.
Desk lamps aren't inferior — they're optimized for different things. A lamp with an articulating arm can target printed materials, handwriting, or product photography at any angle. For strictly PC-based work, though, the arm and base become prominent objects in your visual field. In a small studio apartment, that difference is surprisingly significant. A monitor light "adds light without adding visual presence."
For color temperature, 5000K–6500K is the right daytime range, as BenQ recommends. Office lighting guidelines similarly point to 4000K–5000K for task work — not so blue it's harsh, not warm enough to blunt focus. For video editing or writing, adjustability beats a fixed color temperature every time. A fixed lamp feels right some days but blindingly bright at night.
Priority summary: external monitor users, people with small desks, and anyone who finds their keyboard and notes hard to read should get the monitor light first. People who work with spread-out physical materials, frequently handle objects on the desk, or do significant non-PC work are better served by a desk lamp. Relying on overhead lighting alone costs nothing extra but costs you a tier of work quality.
Storage Risers and Monitor Stands: Buying "Above" and "Below"
The appeal of a monitor stand or storage riser is that it creates two usable layers without expanding your desk's footprint. A monitor stand lifts your screen while freeing the space underneath for a keyboard or small items — one of the more efficient improvements within ¥30,000. Amazon Basics-style adjustable stands offer examples like 7.3–12.3 cm height range in three steps with a 10 kg weight capacity. That's useful not just as a monitor platform but as a foundation for storage beneath it.
The under-riser space is more valuable than it looks. Even 7.3 cm is enough for a slim keyboard, leaving a little room for cables and small items beside it. You work with a clear expanse in front, then slide the keyboard back in when you're done — a tiny motion that keeps the desk consistently uncluttered. That "low effort to put things away" quality is the kind of thing that matters every single day.
More height isn't always better, though. If the riser is too tall, you gain screen position but lose typing posture. Resting a laptop directly on a tall stand improves your sightline but raises your arms too high, compressing your shoulders. For laptop users, a fixed-lift stand like Rain Design's mStand paired with an external keyboard and mouse creates a more natural separation of hand and eye heights. Aluminum stands sit with satisfying weight — they don't shift during typing or trackpad use, which is a quiet but real comfort gain.
Storage risers add what monitor stands don't: horizontal extension. A slim desk with a side shelf creates distinct spots for a router, audio interface, stationery, and power hardware — all off the main surface. Shallow desks make putting everything on one plane impossible, and vertical storage genuinely saves you from that bind. The key question: does the riser's width and weight rating match what you actually plan to put on it? A 40 cm–wide stand with a 24-inch monitor pushed to one edge looks and feels cramped.
Size Confirmation Checklist
"Bought it, but it's too big" is the most common sizing mistake for desk accessories. Here, numbers beat intuition.
- Desk width
After placing a monitor stand or shelf, check that the keyboard and mouse still have room to move. Even a 120 cm top fills up when speakers and document trays join the party.
- Desk depth
When a monitor stand or light base moves in, ensure input space at the front isn't squeezed out. On slim desks, this is the first thing to verify.
- Table top thickness
The prerequisite for any clamp-mount cable tray or monitor arm. Target range for most clamp trays: 18–30 mm, or 10–40 mm depending on the product.
- Inside leg clearance
Matters when you want to slide a wagon or storage rack under the desk. Outer dimensions alone can mislead — a leg frame often blocks what should theoretically fit.
- Outlet position
Critical in wall-facing layouts. Whether your power source is on the left or right side determines where your strip and cable tray live.
- Chair armrest height
Arms that can't clear the desk edge become a problem regardless of how well the desk otherwise fits. True for both sit-stand desks and slim replacements.
- Monitor stand height
What you need from the stand depends on whether you're raising screen position or creating under-desk storage. Too much height can align your eyes while destroying your typing posture.
- Monitor stand width and weight capacity
Not just "will it hold the monitor" but whether the monitor's foot width and actual load fit with margin. A 40 cm–wide, 10 kg stand is a reasonable starting guide for small to mid-size monitors.
Common Buying Mistakes and Priority Pitfalls
Five Buying Patterns That Backfire
The most common failure at the ¥30,000 level is buying what catches your eye rather than what's causing the problem. A desk built piece by piece can look like it's coming together when in fact the order is wrong — and that just increases clutter density without solving anything.
Pattern one: buying purely for aesthetics. A wood-grain pen cup, desk mat, gadget tray, and ambient RGB lighting can all photograph well. But if your shoulder pain comes from desk height, your eye strain from darkness, and your clutter feeling from exposed cables — none of those root causes have changed. This kind of buying fills your desk with "display pieces" while actually shrinking your working area.
Pattern two: skipping size verification. The trap here isn't just checking width. For a monitor stand you need width and depth; for cable trays and monitor arms you need table top thickness and whether there's clearance for the clamp. Clamp-mount trays are typically designed for tops 18–30 mm thick, with some supporting up to 40 mm — but even within spec, a rear panel or modesty board can make clamping impossible. The plan fails exactly there.
Pattern three: choosing a layout without checking outlet position. You want the desk against the wall, the shelf on the left, the USB-powered monitor light running through the hub — but if the wall socket is on the opposite side, your cables are already losing. Start extending with power strips and the floor clutter grows back instantly. Layout failures happen more often at the outlet than at the furniture.
Pattern four: saving cable management for last. Classic mistake. Add a monitor stand, a light, a laptop stand, a charger, and a speaker first, and every added device brings another connection point. What started as two cables becomes a tangle of USB power, the power strip, AC adapters, and excess cord length. Try to manage that after the fact and you're running a cable archaeology dig rather than tidying up.
Pattern five: going all-in on large furniture. A sit-stand desk or large table top has real ergonomic payoff. But an oversized table in a small room crowds out chair movement, hallways, and storage access. Large furniture also creates delivery and moving headaches. Tilt too far toward the desk within ¥30,000 and you end up with an expensive desk that's frustrating to use because there was nothing left for lighting or cable management. The alternative — keeping a fixed desk but adding a monitor riser, laptop stand, and slim storage — delivers better practical outcomes in compact spaces.
One overlooked cost trap: total prices for sit-stand desks routinely exceed the list price.
- Top and legs sold separately — the desk isn't finished without both
- Shipping can be substantial
- Clamp mounts may require extra hardware or reinforcement plates
- Assembly tools not included
- Cable trays and strips added later distribute the spend
Each item looks small individually. Together they add up. If you're only tracking the headline price, you'll find your lighting and cable budget gone before you expected.
The Priority Sequence for Avoiding Mistakes
The principle for avoiding failure is simple: fix the sources of discomfort before working on appearance. The order is roughly posture → lighting → cables → aesthetics.
Start with posture. Adding accessories while your body is already fighting the wrong desk height leaves the underlying problem intact. If you're keeping the fixed desk, align heights first with a monitor riser, laptop stand, and external keyboard. If you're tilting toward a sit-stand desk, calculate how much the rest of your budget can absorb before committing. Without clarity on "what change would make my body comfortable," every subsequent purchase drifts.
Next, lighting. Dim hands undermine every other improvement. A monitor light is one of the least disruptive upgrades in terms of desk footprint, and it pairs naturally with PC work. BenQ's recommended daytime range of 5000K–6500K is bright enough to work clearly without being harsh — a good calibration point. Concentration doesn't last when you're straining to see, so light follows posture as the second priority.
Then cables. Low-profile work, but the earlier you do it, the easier it is. A standard 5 kg–class clamp tray handles a power strip and a handful of adapters without issue. The subjective experience: all the floor and desktop power clutter vanishes upward in one move. Do this last and you'll have to shift everything to thread cables through, adding significant rework.
Aesthetics last. Desk mats, small organizers, color coordination, wood grain or matte black themes — all of these land better when the foundation is solid. Done in the wrong order, you end up with attractive accessories sitting on top of a cable mess.
The logic is simple:
- Fix posture
- Add lighting
- Hide cables
- Refine appearance
💡 Tip
When you're unsure what to buy first, identify what feels uncomfortable the moment you sit down, and fix that first. Wrong height, dark hands, cables at your feet — eliminate those three and your desk gets substantially more functional even with very few items on it.
Small-Room Considerations
In a studio apartment or wall-facing setup, conventional wisdom for larger spaces doesn't directly apply. The failure mode here isn't furniture that's slightly too big — it's furniture that erases your movement paths. A large desk that prevents pulling out the chair, blocks the gap between the bed and storage, or stops a wagon from opening makes the space worse, not better.
In small rooms, building upward outperforms spreading outward. Slim desks with shelves, monitor risers, and narrow wagons add storage without claiming more floor. Some slim desk options measure as narrow as 995 mm wide × 290 mm deep × 720 mm tall. That shallow depth quickly runs out of space if you place everything on the surface — which is exactly why a monitor riser and side wagon are essential companions rather than optional extras.
Small rooms also create more clamp interference. Pushing the desk to the wall means the monitor light's power cable or a cable tray's overhang might require rear clearance you don't have. Monitor arm and cable tray clamps compete for the same edge. On a shallow top, one additional clamp meaningfully reduces your layout flexibility.
The case against going all-in on large furniture is stronger in small spaces. Spending most of the budget on a sit-stand desk leaves nowhere to put everything else — the desktop ends up crowded anyway. A compact-space improvement plan won't deliver the dramatic posture shift of a sit-stand desk, but it doesn't add room pressure while raising day-to-day workability. Factoring in chair mobility, a path from the door, and distance from the bed, "bigger desk = better" simply doesn't hold in a small room. A slightly smaller desk with proper cable management and vertical storage typically produces less daily friction than going large.
Sample Purchase Lists at ¥30,000 (~$200)
Configuration A: Sit-Stand Desk–Focused
If posture change is your biggest priority, this is the plan. Honest caveat: ¥30,000 is tight for "a solid sit-stand desk and solid peripherals." The realistic approach is to center the desk, add minimal cable management and lighting, and lock in the highest-impact items first.
The IKEA SKARSTA's historical price points — ¥19,990 (~$133 USD) for the 120×70 cm configuration, ¥26,990 (~$180 USD) for 160×80 cm (2016 IKEA Japan pricing) — still serve as a useful reference for "what height adjustability costs." These are past figures; verify current availability and pricing at the IKEA website. Adding a clamp cable tray and monitor light pushes the total past ¥30,000 easily, so the build requires selectivity.
A configuration that stays within ¥30,000:
- IKEA SKARSTA 120×70 cm: historical reference price ¥19,990 (~$133 USD)
(Note: this is a 2016 example. Confirm current availability and pricing at ikea.com)
- Role: foundation for switching between sitting and standing
- Clamp cable tray: reference price ¥2,000–4,000 (~$13–27 USD)
- Role: route power strip and adapters under the desk, clear the floor
- Zip ties / cable holders: reference price ¥500–1,000 (~$3–7 USD)
- Role: bundle excess cord length and reduce visible cable count
- Monitor light: reference price ¥3,000–6,000 (~$20–40 USD)
- Role: bring enough light to your hands for evening work sessions
Running total: approximately ¥25,490–30,990 (~$170–207 USD). To stay under ¥30,000, pick the monitor light from the lower price tier, or defer it and focus on desk plus cable management first. Getting the desk in place changes the feel of sitting down immediately — but the overall build stays rougher than the peripherals-focused plan until you fill in the rest.
The 160×80 cm configuration ran ¥26,990 (~$180 USD) historically. Adding only a cable tray puts you at roughly ¥28,990–30,990 (~$193–207 USD), so the wider top is feasible only if you set the monitor light aside for now.
For reference: PC Watch covered a Nitori electric sit-stand desk at ¥19,990 (~$133 USD), and gooda listed one at ¥26,380 (~$176 USD). The one-touch convenience of electric is real, but there's very little room for peripherals after that spend.
Configuration B: Balanced Peripherals
This is the most failure-resistant approach — improve on your existing fixed desk through accessories. It isn't flashy, but it reduces friction at every step. Particularly effective if dim lighting, cable clutter, and cramped desktop space are all bothering you at once.
The anchors: monitor light + clamp cable tray + monitor stand or storage + external keyboard and mouse + power strip. A reliable wireless combo like the Logicool MK270 pairs naturally with a raised laptop — it lets you drop your hands lower than the screen, which is where posture starts to matter. An Amazon Basics-style monitor stand works fine here too. The extra height under it becomes a keyboard garage when you're not typing, making the desk feel meaningfully larger.
Sample configuration:
- Monitor light: reference price ¥5,000 (~$33 USD)
- Role: reduce brightness contrast between screen and surrounding work surface
- Clamp cable tray: reference price ¥3,000 (~$20 USD)
- Role: consolidate power strip and adapters under the desk
- Monitor stand / storage riser: reference price ¥3,000–5,000 (~$20–33 USD)
- Role: adjust screen height and create two-tier desk storage
- External keyboard and mouse: reference price ¥5,000–7,000 (~$33–47 USD)
- Role: improve input posture and create distance from the laptop screen
- Power strip with surge protection: reference price ¥2,000–3,000 (~$13–20 USD)
- Role: centralize power distribution, making cable routing easier
Total: approximately ¥18,000–23,000 (~$120–153 USD). Within the ¥30,000 envelope, there's meaningful room left for cable holders, a wrist rest, or a slight upgrade on the keyboard. Not replacing the desk is what keeps this configuration so efficient — every yen goes directly toward daily quality of use.
The cable tray's standard 5 kg rating handles a power strip and several adapters without issue. A monitor stand that lets you stow a slim keyboard underneath makes an immediately noticeable difference in how spacious the desk feels. It's not a dramatic transformation — it's the kind of "quietly comfortable every day" improvement that compounds over months.
Configuration C: Compact Space
For a studio apartment or wall-facing setup, thinking vertically outperforms expanding sideways. A slim desk with a built-in shelf lets you build a work area and storage in the same footprint, without pressure on the rest of the room.
Slim desks with shelves in the Officecom product family include options measuring around 995 mm wide × 290 mm deep × 720 mm tall. At that depth, surface space fills instantly — a monitor riser to create two layers, and a wagon beside the desk for overflow, are essential rather than optional.
Basic configuration:
- Slim desk with shelf: reference price ¥10,000–15,000 (~$67–100 USD)
- Role: work surface and vertical storage in one compact footprint
- Monitor riser: reference price ¥3,000 (~$20 USD)
- Role: create above-and-below storage on a shallow top
- Clamp cable tray: reference price ¥3,000 (~$20 USD)
- Role: keep floor cables from accumulating
- Monitor light: reference price ¥4,000–6,000 (~$27–40 USD)
- Role: light a shallow desk effectively without adding surface items
- Slim wagon: reference price ¥4,000–5,000 (~$27–33 USD)
- Role: offload stationery, chargers, and peripherals from the surface
Total: approximately ¥24,000–32,000 (~$160–213 USD). The upper end exceeds ¥30,000, so some substitution is expected. To stay within budget: a desk around ¥10,000 + riser at ¥3,000 + cable tray at ¥3,000 + monitor light at ¥4,000 + wagon at ¥4,000 = roughly ¥24,000 (~$160 USD). If the desk is in the ¥15,000 range, dropping the wagon brings total to approximately ¥25,000–27,000 (~$167–180 USD).
The strength of this configuration is solving "nowhere to put anything" without adding floor area. It won't deliver the direct ergonomic improvement of a sit-stand desk, but in compact spaces the more pressing problem is often a desk so overloaded that starting work feels impossible — and this addresses that directly.
Configuration D: Existing Desk, Posture–Focused
If you want to reduce neck and shoulder strain while keeping your current desk, this is the practical path. Particularly for laptop-centric work — where the screen and keyboard share one position — the resulting posture degradation is significant. Separating those two immediately changes how your body feels.
The core is a laptop stand plus external keyboard and mouse. An aluminum stand like Rain Design's mStand raises the screen and creates airflow beneath the laptop — a useful side effect. The weight of metal stands keeps them planted during typing. Send the keyboard and mouse to a separate, lower position and you get the natural "eyes up, hands down" alignment.
Sample configuration:
- Laptop stand: reference price ¥2,000–4,000 (~$13–27 USD)
- Role: raise screen height to reduce neck forward-tilt
- External keyboard and mouse: reference price ¥5,000–7,000 (~$33–47 USD)
- Role: lower hand position, ease shoulders and wrists
- Monitor light: reference price ¥4,000–6,000 (~$27–40 USD)
- Role: light the work surface and screen surround for evening sessions
- Clamp cable tray: reference price ¥3,000 (~$20 USD)
- Role: tidy the power hardware under the desk
- Rubber mat / wrist rest: reference price ¥2,000–3,000 (~$13–20 USD)
- Role: cushion contact points at the wrists
Total: approximately ¥16,000–23,000 (~$107–153 USD). Comfortably under ¥30,000, with room to step up the keyboard or light without breaking the budget. No desk replacement means no dramatic visual change, but from a posture standpoint this configuration competes well on cost-effectiveness.
This plan is a particularly good fit for people who are broadly satisfied with their desk but find laptop direct-placement posture genuinely uncomfortable. It doesn't offer the standing-option shift of a sit-stand desk, but it's a quiet, steady upgrade to the quality of seated work.
Comparison Table: Strengths, Weaknesses, and Target User by Configuration
Side by side, the four configurations make the tradeoffs concrete. The right choice depends on which frustration you most want to eliminate, not on which outcome looks most impressive.
| Configuration | Estimated Total | Strengths | Weaknesses | Best For |
|---|---|---|---|---|
| Sit-stand desk–focused | ~¥25,490–30,990 (~$170–207 USD) | Cleanly introduces standing and postural variety | Little budget left for peripherals | Long-session sitters who want to add movement first |
| Balanced peripherals | ~¥18,000–23,000 (~$120–153 USD) | Addresses lighting, cables, and input in one package | Can't change desk height itself | People happy with their fixed desk but wanting more comfort |
| Compact space | ~¥24,000–32,000 (~$160–213 USD) | Builds workspace and storage in small rooms | Ergonomic gains are layout-dependent, not as direct | Studio-apartment or wall-facing setups where space pressure matters |
| Existing desk, posture–focused | ~¥16,000–23,000 (~$107–153 USD) | Tackles neck/shoulder strain at low cost | Desk appearance doesn't change meaningfully | Laptop users suffering from forward-head posture |
Prices are reference figures — expect movement by retailer and timing. Within the same ¥30,000 envelope, the character of the finished desk changes dramatically depending on whether you center the sit-stand desk or spread the budget across peripherals. For consistent day-to-day improvement, balanced peripherals and posture-focused configurations are the most reliable. If postural variety is the single overriding goal, sit-stand desk–focused is the right call.
Wrapping Up: The Buying Order That Works for You
For related reading, check out the site's remote work desk gadget guides and USB-C cable selection articles.
Related Articles
The Complete USB-C Cable Buying Guide: Same Plug, Wildly Different Performance
The Complete USB-C Cable Buying Guide: Same Plug, Wildly Different Performance
A clear breakdown of USB-C cable standards, transfer speeds, and charging capabilities — plus how to pick the right cable for what you actually need.
Wired vs Wireless Earphones: Sound Quality, Latency, and Everyday Usability
Wired vs Wireless Earphones: Sound Quality, Latency, and Everyday Usability
The real question isn't which is better — it's which one actually fits how you listen. At the same price point, wired still wins on raw audio quality and latency. If lip-sync drift in movies or split-second timing in FPS and rhythm games matters to you, that gap is real and hard to ignore.
What Is USB PD? Understanding Wattage and Compatible Devices
What Is USB PD? Understanding Wattage and Compatible Devices
Just because a device has a USB-C port doesn't mean it supports USB PD fast charging. Confusing the two leads to the classic trap: buying a 65W charger and getting only 30W out.
Carry-On Power Banks on Flights: The 100Wh/160Wh Rules Explained
Carry-On Power Banks on Flights: The 100Wh/160Wh Rules Explained
When flying, power banks must go in your carry-on — checked baggage is never an option. The key isn't mAh but Wh: under 100Wh is the standard safe zone, 100–160Wh requires airline approval, and anything above 160Wh is prohibited.